
The Mods tab installs 7 Days to Die mods: server-side mods, XML modlets and full overhauls.
- Sign in to the control panel at panel.chicagoservers.co and open your 7 Days to Die server.
- Open the Mods tab. Under Add a mod:
- Click Install on a mod from the list, such as Allocs Server Fixes or an overhaul like Darkness Falls.
- Or use From a link (a direct link to the mod's archive) or From a file on the server (an archive you've uploaded on the Files tab).
- Restart the server. Mods load when it starts.
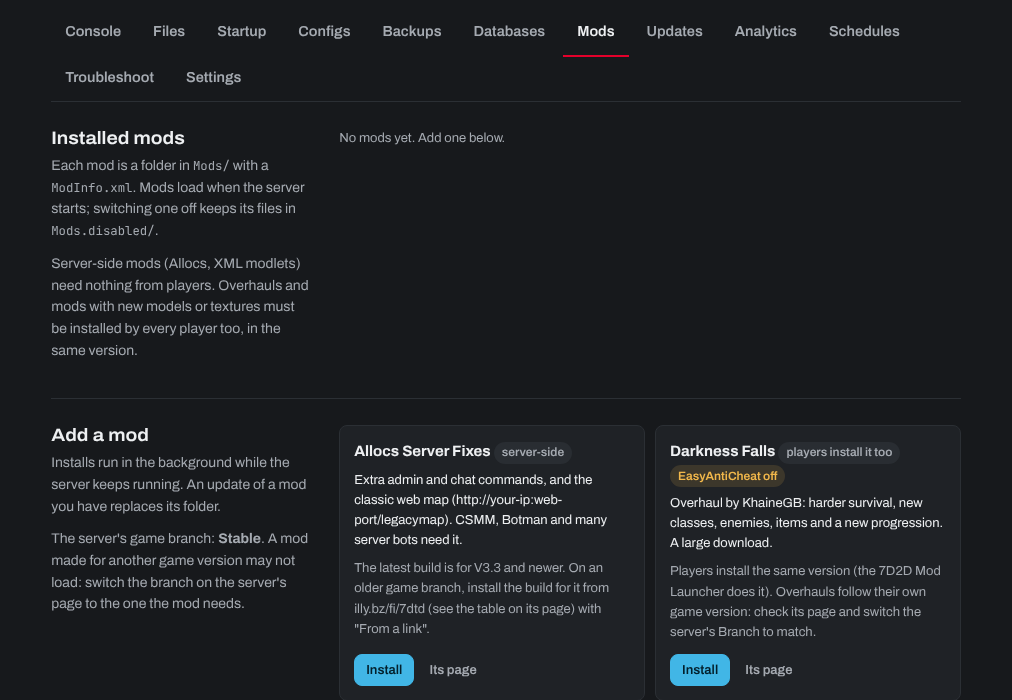
- Server-side mods (Allocs, XML modlets) need nothing from players.
- Overhauls and mods with new models or textures must be installed by every player too, in the same version, usually with the 7D2D Mod Launcher. They need EasyAntiCheat off (Configs tab).
- A mod made for another game version may not load: switch the server's branch to the version the mod needs (Branch on the Steam update bar).
Installed mods are listed on the tab, where you can switch one off (its files are kept) or remove it.
Need help? Open a support ticket and we'll take a look.